Following their repulse at Elwick Bridge, Hugh de Puiset and his band of Frenchmen, withdrew and found an alternative route to Durham on the north bank of the Char Beck. Despite the wound he received in the earlier encounter, Hugo Flambard hurried his small band of supporters to attempt to block the French for a second time and, hopefully, drive them back to their ships moored in the port of Hartlepool.
Flambard's deployment was a hurried affair, with his spearmen arriving on the battlefield just in the nick of time...
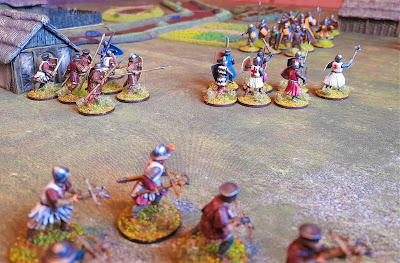
Upon sighting the Flambard forces, the French deployed into a ragged line, crossbowmen on the left, spearmen in the centre and de Puiset, with his Men-at Arms on the right. Flambard's archers arrived on the left of their line, with the two units of spearmen hurriedly advancing in a column on the right.
As Turn 1 continued, Hugh de Morville races ahead and de Puiset leads his Men-at-Arms towards the enemy. The French crossbowmen realise that they have no room to influence the battle and begin to move across to the right flank, where they can face the Flambard archers.
Meanwhile, the Flambard spearmen advance to find room to deploy into a battle line before the Frenchmen can engage while they are still in their marching column.
At this point in the battle, disaster struck for the French invaders... forced to take a Bravery Test after drawing the Bol de Porry card, the crossbowmen panic and unexplainably rout from the battlefield heading off back towards their ships!
Unaware of events unfolding behind him, Hugh de Morville, the slayer of Thomas Beckett, hurled himself into the fray, and engaged in a deadly duel with the leader of one of the Flambard spear units.
With the narrowest of modified die rolls, de Morville inflicted a nasty wound upon his adversary and forced him back into the midst of his men.
In the centre of the line, the French Men-at-Arms charged into the second of the Flambard spear units and a mortal combat ensued.
Under pressure all along the line, the Flambard spearmen began to take casualties and were forced back by the relentless pressure of the French onslaught.
At this critical point in the battle, de Puiset was wounded by a Flambard arrow and, with the Flambard archers working their way around behind the French line, it looked as though Sir Hugo might just snatch victory from the jaws of defeat. However, the archers next volley proved ineffectual and little now stood between the French Men-at-Arms and the road to Durham.
With his faithful lieutenant, Jerrard Sibton, wounded in the clash with the Men-at-Arms and his spearmen crumbling all around him, Hugo Flambard began to realise that his attempt to block the French advance on Durham looked doomed to failure.
Over on their right flank, things looked no better for the Flambards; de Morville had continued to drive on the French spearmen and, under the relentless pressure, the Flambard spearmen, with only two unwounded men remaining, began to fall back across the field.
After an epic and bloody struggle, the Flambard line collapsed and the few remaining survivors fell back, leaving the field of battle to the victorious Frenchmen. In all, the Flambard's had lost over half their number and, of those remaining, only Hugo and two of his spearmen remained unwounded. Fortunately, the archers had managed to extricate themselves, having expended all their ammunition, to fight another day.
The gallant French Men-at-Arms had finally had the opportunity to display their martial prowess; an opportunity denied them in the confined space at the battle of Elwick Bridge.
Finally, the run of Flambard victories had come to an end and de Puiset was able to join forces with his uncle, the Bishop of Durham. Sir Hugo would need to recruit new forces and plan a new strategy to defeat the combined forces of the de Puiset dynasty.


No comments:
Post a Comment