Intro

Intro

Tuesday 30 May 2023

SHARP PRACTICE... 1ST AFGHAN WAR UPDATE!

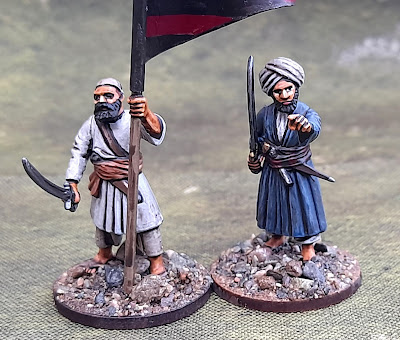
This week I finally completed my second Afghan group for Sharp Practice; a 12 figure bunch of rogues under the command of the equally roguish local Mullah, Abdullah Shambhani. The Mullah Abdullah is a lowly village cleric who has seized the opportunity to make a name for himself by calling the faithful to arms in response to the British invasion of his country. He is aided in his mission by Amail Domki, who carries the red and black banner, which symbolises the blood of the infidel cascading into the terrible depths of hell!

Abdullah's Ghazi warriors are the Sword of God, protectors of the believers and sworn to rid Afghanistan of the infidel invaders. They carry no firearms and need no shields because they have a higher form of protection! To die in battle is to become a martyr and Abdullah has promised his warriors eternal life should they fall defending their homeland.

The Mullah Abdullah and his right hand man, Amail Domki.

Because they are effectively religious adventurers, being driven by loyalty to a cause, rather than loyalty to the tribe, I have classed them as Wallahs, but, having that religious furver to drive them on, they get the "Big Choppers" characteristic, which gives them ten dice if they do survive long enough to get into Fisticuffs with the enemy.


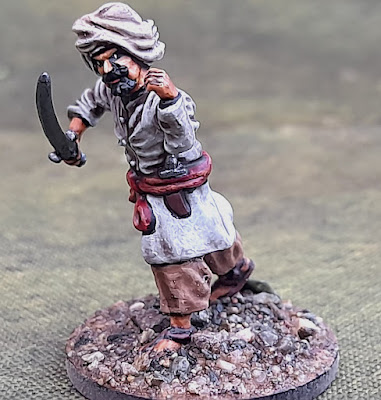
The Afghans are a mixture of figures from Perry Miniatures and Wargames Atlantic. The Perrys are slightly taller and somewhat bulkier than the Wargames Atlantic figures and I definitely prefer the Perrys. However, having the Wargames Atlantic figures does add some extra variety and they are certainly worth having in the warband.

Eventually, my warband will have a second 12 man group intended principally for Fisticuffs, but they will be a Tribal group, so will have some shooting capability, and will be lead by the Force Leader, Kahn Sheik Jabooti. There will also be three skirmishing groups, two jezail armed and one wielding muskets.

The first jezail armed group is lead by Wakmai Butt and I think will be classified as an Irregular Skirmish Group (Rifles). Most sources I've read so far suggest that the jezail had a longer range than the British Muskets and the jezailmen were able to snipe effectively from cover without suffering in return. In Sharp Practice, rifles require two actions to re-load and I think this balances out the longer range of the jezail.

Wakmai Butt... Leader of the Durrani Jezailmen.


Of course, when you embark on a brand new topic, it's not all about painting the troops...


Tuesday 2 May 2023

LION RAMPANT - BATTLE FOR THE BEEF AND THE BOOZE!

 The Dun Rheged Chronicles!

Publius Decimus Barbula, Warlord of Dun Rheged.

Conchobhar, Warlord of Dal Riatta, has been raiding the fertile lands of Dun Rheged again! Having rifled the wine cellars of several noble villas and acquired a handsome herd of long horn cattle, he is leading his warband home to a victory celebration, including generous portions of medium rare steak and lashings of Cotes du Rhone. Being somewhat miffed at Conchobhar's thievery, his arch enemy, Barbula, has rushed his own warband toward the ford across the River Isca, determined to give the Irishmen a jolly good thrashing and return beef and booze to their rightful owners.

Special Rules for the Irishmen's loot...

Cattle: Move with controlling unit. If abandoned, they remain in place, enjoying the lush grazing, until someone arrives to claim them.

The Wine Cart: Moves with controlling unit. If the controlling unit fails a Move Activation, they must immediately take a Courage Test. If the Courage Test is failed, they become “Plastered” and begin to imbibe the vigorous Gallic grape whilst savouring its full bodied aromatic bouquet. They must test to Rally in subsequent Rally Phases and, should they fail the test they remain “Plastered” and one figure is removed, too inebriated to continue. They do not fall back, but remain in place while the more sober members of the Unit attempt to regain control, which they do if the test is passed. If abandoned, the cart remains in place until someone arrives to claim it.

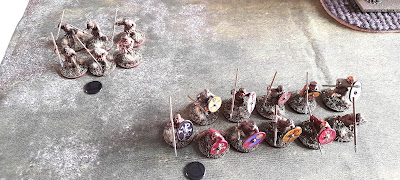
The first unit to arrive on the field of battle were a group of Irish warriors, eager to reach the ford across the river...
following quickly behind the warriors, Conchobhar's light cavalry galloped on towards the river...
None of the units were on the table at the outset of the game; the Irish entered on the southern edge in an order based on the roll of a D6, followed by an activation roll. If the activation roll failed, the Romano-British had the opportunity to roll for their units to arrive, with an additional D6 roll to determine whereabouts on the western table edge they would be placed.
A good string of activation rolls saw the Irish flood onto the table with no Romano-British forces to oppose their dash for the safety of the river. Conchobhar's skirmishers arrived with the herd of top quality beef and pushed on northwards.
Finally, Barbula's forces put in an appearance, with his Numeri skirmishers rolling to arrive in the wood, quickly followed by a unit of Light Infantry Pedyts, who came onto the table in the open ground at the southern table edge.
Just like waiting for a chariot, a third Romano-British unit arrived... more Numeri Skirmishers, entering the action in the swamp adjacent to the river. At this stage, things were not looking too promising for the Irish.

Fortunately for the Irish raiders, the next unit to arrive, yet more Romano-British, also rolled to appear in the wood, behind the Numeri Skirmishers. These tough fighting men were Barbula's veteran heavy infantry with Diomhair Darach, the mystical Druid and they were going to have to fight their way through the dense undergrowth, before they could come to grips with the loot laden raiders.
Realising that his passage to safety was now seriously threatened, Conchobhar despatched his light cavalry to skirmish with Barbula's Pedyts and the first casualty of the encounter fell under the hail of Irish javelins.
The Irish horsemen realised, to their horror, that they had exposed themselves(!) to an attack from the Numeri in the woods! Yet more javelins whistled through the air, this time striking the hapless Irishmen. 
As if their situation wasn't desperate enough, the Irish horsemen were suddenly confronted with the dreadful sight of Barbula himself, leading his heavy cavalry into the action. The Irish were only saved by a terrible activation roll, which prevented Barbula's charge and brought the Romano-British turn to a premature close.
Meanwhile, on the opposite side of the table, Conchobhar had finally arrived, leading the wagon containing the precious elixir. With the overwhelming numbers of Romano-British arriving to the west, the Irish warlord was desperately needed to shore up a rapidly deteriorating situation... the wine would have to be temporarily abandoned, for Conchobhar had more pressing matters to deal with!
Barbula finally managed to get his horsemen moving and piled into the Irish horse, who had failed to roll enough to take an evade action! Inevitably, the raiders came off second best, loosing two casualties and being forced into an ignominious retreat.
Having fought they way through the wood, the veteran heavy infantry, spurred relentlessly on by Diomhair the Druid, found themselves unceremoniously assailed by one of the groups of wild Irish warriors. Wherever the Irish warriors fight, utter chaos is bound to ensue. This particular group had their own attached holy man, Brother Bearach, the Resurrected Martyr. As expected, once the melee began, copious quantities of blood were shed and casualties were spawned on both sides. The ghastly slaughter caused Irish and British to fall back battered, in spite of the presence of the two rival holy men.
Having fallen back from their savage clash with the Romano-British heavy infantry, the Irish warriors found themselves targeted by the skirmishing bowmen sheltering in the sodden swamp. Even though they were now outnumbered, lead on by Brother Bearach, the warriors threw off their battered status and made another wild charge into their adversaries, who, themselves had only just recovered from the previous encounter.
Once again, this vicious clash of titans resulted in death and both sides recoiling in a desperate state of fatigue, so badly beaten that they each turned and fled from that place of horror and savage butchery.
Seeing his veteran infantry streaming back through the wood, Barbula called to his oath sworn companions to throw themselves into the ranks of their bitter enemy and so, the lords of Dun Rheged and Dal Riatta came face to face in one final desperate clash of arms. Back and forth the violent struggle swayed, with first one side and then the other gaining the upper hand but, eventually the death toll proved too great for Barbula's brethren and the great Lord of Dun Rheged found himself facing the Irish raiders alone and was forced the flee this field of savage ferocity. 
Bruised and battered, Barbula turned and rode to safety, leaving the victory to the raiders from Dal Riatta...
Seeing their liege lord riding from the field was too much for the remaining men of Dun Rheged, they too becoming battered and reluctantly leaving the spoils of war to the enemy.
The looted cattle were driven over the ford to the delight of the Irishmen, soon to be followed by the cart of Bacchus...
Publius Decimus Barbula had sworn to prevent the Irish raiders from escaping Dun Rheged with their pillaged spoils, but the power of the enemy infantry had proved too much for the Romano-British. And so, the day belonged to Conchobhar and his raiding warriors who were able to cross the ford over the River Isca and make their way back into their own lands, to bask in the glory of their victory and enjoy massive steaks washed down with the finest Roman vino!