Thursday, 17 December 2020

Mortal Gods - A Tribute to Ray Harryhausen?

This has to be the final new project of 2020!

When I look back on 2020, even more remarkable than the Global Pandemic, will be the number of new gaming projects I have started. True, not all of them are completely new, some of them are continuations of previous projects, like the starting of a German grenadier platoon for Chain of Command; this was a response to the possibility that I would only ever get to play solo games and would need some opposition for my Soviets.

I've been looking at Mortal Gods ever since I started visiting the Footsore Miniatures web site to buy figures for my Dux Britanniarum Irish Raiders project. Bad form that really... I think wargame related web sites should have some kind of filter that only allows you to look at the products that you have gone on to look at. Those of us who suffer from Wandering-to-other-sfuffitus don't need the temptation of nicely laid out buttons, that only have to be clicked upon to take us into a whole new world of figure enticement and the resultant cash outlay.

In the case of Mortal Gods, the subliminal seed has been slumbering airily since the late 1960s and only needed a bright shiny rule book with pictures of Hoplites and the words "skirmish games" printed boldly on the front cover to awaken the sleeping impulse to click on those seductive buttons containing the words "Add to Basket". The legacy of Ray Harryhausen and his clickety-clicking skeleton warriors, springing up from the teeth of the Hydra, has been fulfilled fifty years later in the form of the Mortal Gods Core Box Set and yet more unfinished projects confined to the ever-growing "to be completed at a later date" cupboard.

Of course, as a serious historical gamer, my original announced intention was to paint proper Greek warriors and fight proper skirmishes between Athenians and Spartans set in the serious historical strife of the Peloponnesian Wars. Wargamers are experts in Orwellian Doublethink and have no difficulty whatsoever believing that they are only going to play historical games while they click on the Pay Pal button to purchase a box of Wargames Atlantic skeletons and a set of Hades Faction Cards.

So far, I've started painting some hoplites in linothorax body armour from a Victrix Miniatures Athenian Warriors set that I bought at Partizan years ago, but I don't want to have very many of these, so the half dozen I have done will probably be enough. What I really want to focus on (apart from the skeletons) are the more lightly attired figures, so I'm now doing some un-armoured hoplites and I have a bundle of sprues with slingers, peltasts and archers waiting in the wings ready to build.


Of course, one of the issues with hoplite figures is that you spend ages meticulously painting the linothorax and then you stick that great big shield on and you can't see any of the painstaking work you have done. At least when you are commanding your troops on the table top, you get the see the work you did on the back.


The shield designs on these figures come from the set produced by Battle Flag. I decided to use these, partly because I already had some, and partly because they are waterslide transfers and I was a little concerned about getting a good result when applying a transfer to the significant dome of a hoplite shield. Waterslide transfers do work very well when you use Micro Sol to soften them and, as they dry, they conform nicely to the shape of the shield. As I was buying some LBMS transfers for the light infantry figures, I decided to buy a single set for the hoplites, just to see how well they worked and, to be honest, they are absolutely superb. Just like the waterslide transfers, if you apply a coat of Micro Sol to the surface of the shield before you stick the LBMS decals into place, they conform to the domed surface brilliantly and they just look far superior to the waterslide transfers. Most of the waterslide transfers have needed touching up here and there and you have to work them quite hard to get them to sit flat without overlaps where the transfer meets the rim of the shield. Work them too hard however and that is where some of the print wears away and you need to touch them up with an application of paint. At £9 for 50 Battle Flag transfers, you can't complain at the value, but I think I might just acquire a few more LBMS decals, just to add to the variety you understand!


The Victrix hoplite miniatures are great fun, if a little time consuming, to paint. But I'm really looking forward to having a go at the lighter troops as well.


Some of the casting on these figures is a bit blocky, particularly the sword scabbards, but they are full of the usual Victrix character. More of these to work on over Christmas, both as hoplites and peltasts.

Wednesday, 18 November 2020

MINI PROJECTS 2 - GERMAN PLATOON HEADQUARTERS FOR CHAIN OF COMMAND

Although my current focus is painting Irishmen for Dux Brittaniarum, I really like the idea of running mini projects along side the main campaign. There are two advantages of doing this; firstly, it keeps background projects ticking over and moving forward and, secondly, it adds a bit of variety which is a definite painting motivator.

I’ve had a squad of Warlord German infantry painted for some time now, which will eventually be opposition for my Soviets and decided that my next mini project ought to be painting up the Platoon HQ. The Chain of Command German HQ is made up a Senior Leader (Unterfeldwebel) and a two-man Panzerschrek team. The Unterfeldwebel I decided to make up from the Warlord plastic grenadiers sprue:


As with all good World War Two senior non-commissioned officers, he has a map, a pair of binoculars and an SMG. He's also wearing the zeltbahn and I will need to do some re-research, as I have completely forgotten which colours I used when I painted my first squad! 


The business half of the Panzerschrek team is a metal figure from Warlord, but I have given him a head from the plastic grenadier set and some plastic kit. The figure has a big hole in his back, as he is supposed to carry a rack of ammo for the Panzerschrek but, I preferred to have the Number Two carry the ammo, which meant coming up with a plan to disguise the hole! The back pack was super glued into place and a small amount of Green Stuff was also needed to finish off the job.

The Panzerschrek ammo carrier is another plastic figure from the grenadiers box, as I wasn’t keen on the metal one that comes in the metal figures pack. The ammo rack had to have a lug removed from the back (the one that fits into the hole in the back of the other figure) and was then super glued into place. I gave him a rifle, glued onto one of the carrying arms and his right arm is the one with a grenade, which was simply lopped off and tidied up.


The finished Headquarters, painted, varnished and based, ready for action. I've really enjoyed doing these and the trick now will be to push on with my Dux Irish and not get diverted into painting more Germans!


Thanks to people on the Chain of Command Facebook page who suggested colours for the Panzerschrek. I finally decided to go with a base coat of Vallejo Middlestone and a bit of highlighting with Iraqi Sand.


Saturday, 31 October 2020

GOT IN HIMMEL! VICTRIX GERMAN WARRIORS

Tish! I take it most unkindly that thou, Victrix Miniatures, who hast had my purse as if the strings were thine, should'st go and tempt me with this lot.
(Slightly paraphrased opening to William Shakespeare's Othello)


Why oh why, Victrix Miniatures, have you gone and done this too me now? Just when I'm revelling in the delights of building and painting Celtic warriors, in all their checky and stripy glory, you tempt me with this!

No less than 60 Germanic warriors all sprued up in their hairy nastiness and presented to the world in a plastic bag. Do those Victrix people actually, for one moment, believe that I'm going to be tempted by a bag of 60 of my absolute favourite of all time wargames figures? Well, yes of course I am, but I have managed to limit myself to just one bag and a load of LBMS shield transfers.

I bought my bag of hairies without the faintest idea what I was going to use them for, but during the long Lockdown Summer, those epic people at Too Fat Lardies introduced the World to Infamy! Infamy! and the painting flood gates opened.

My initial plan had been to use my Germans for a Batavian Revolt army, which would allow me to add some Victrix Roman Auxiliaries to my ever growing mountain of plastic and enjoy lots of head swapping and figure conversion. At the moment, I have enough Germans for an army of Germania Magna and I've left the project there for the time being, while I concentrate on more figures for Dux Britanniarum.

The Germans are the usual superb quality that we have grown to expect from Victrix and knock the Warlord re-hashed Celts into a cocked hat. They have the usual casting lines which are easily removed with a craft knife and, as usual, there are loads of modelling choices you can make to give your warband that haphazard barbarian look. Some of the torsos are a little neat and tidy in my opinion, looking like they may have bought their trousers from the chino section of Cotton Traders, but the massive choice of hairy heads makes it obvious exactly what they are supposed to be; the deranged frenzies of the Teutoburger Wald, the nightmare of Publius Quinctilius Varus and his Roman legions.

Perhaps my only slight gripe with these figures, is their lack of fur! I don't know why, but in my head, Germanic warriors should be covered in loads of fur. After all, they live in the Teutoburg Forest and grow up hunting wolves and bears and other furry beasts. How do you prove your bravery and skill? By hunting furry things and then you show off by wearing the hide of whatever nasty beast you have killed. Having said this, I really enjoyed using my supply of Green Stuff to fashion some additional fur trim to cloaks, just to beef up the general furriness.

I sort of wish I had the time and inclination to build a Germanic army, or any other army for that matter, for a set of big battle rules because a couple of hundred of these figures based in huge warbands would look amazing on the table top. For my Infamy! Infamy! Army I have added some figures from other manufacturers, particularly Wargames Foundry and old Black Tree Design and they blend in together very well, but without the bag of sixty Victrix figures I think even a large-scale skirmish force would be well beyond my price range. They are, without doubt, both great value and superb quality figures and just what we descendants of Arminius and Julius Civilis have been waiting for.


Sunday, 20 September 2020

Mini Projects - A Saxon Champion for Dux Britanniarum.

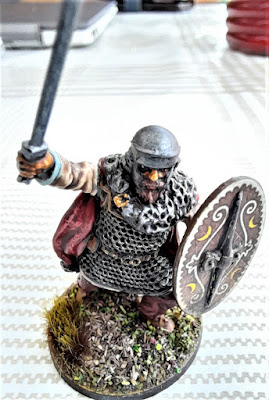
Having completed my Germanic warband for Infamy! Infamy!, I wanted to get back to working on a Saxon warband for my Dux Britanniarum project. Because Dux warbands are relatively small, it's a good opportunity to spend a little more time working on the modelling side of some of the characters who are going influence events in the strife of coming campaigns. The first character of my Saxon warband was to be the Champion, as I had had an image in my head of how I wanted him to look for some time.

This image appears in the Osprey book "Arthur and the Anglo Saxon Wars" and is the inspiration for my Saxon Champion. The components for my figure are a torso, left over from the Victrix Ancient Germans I bought for my Infamy! warband, along with a sword arm and cloak, a head from the SHS Saxon head pack and a Footsore Miniatures shield.

This what the figure looked like when first put together; a little more active than the Osprey inspiration, but looking suitably aggressive for someone who has such an important role to play within the warband.

The addition of some Green Stuff 'fur' around the edges of the cloak add a little bit of opulence and suggest that this character is a man not to be trifled with. 
Painted, based and varnished, Eadwulf is ready for action. The shield, or buckler, has an LBMS shield design applied. In Dux Britanniarum, the Saxons, being raiders, are equipped with the small buckler shield, which prevents them forming shieldwall as a defensive measure!


Sunday, 16 August 2020

Infamy! Infamy! They've all got it in for my hard earned cash!

The midsummer madness continues to play out its crazy machinations with the arrival of the Too Fat Lardies' latest creation, Infamy! Infamy! Somehow, I had completely missed this one, in spite of regular visits to the Lardies web site in search of information and assistance with Chain of Command. When I did become aware of it, just the mention of Germanic armies and the year 69AD lead to yet another raid on the PayPal account to get a copy of the rules but, this time, I already had plenty of lead and plastic ready to start building a warband.

It seems like ages ago now that I bought my box of "Warriors of Germania" from Warlord and failed to be particularly impressed by their re-hashing of their Celtic figures, but I dug those out of their isolation and, with the bag of Victrix Germans that I'd bought when they first arrived on the market, I had the basics of a Barbarian warband for Infamy! Infamy!


I love the idea of Barbarian infantry operating in "Mobs". The Mob above comprises three groups of ten Germanic warriors; the group in front being Oathsworn Warriors, who are the Warlord's personal retinue. I think my initial target will be a warband from Germania Magna, which is the smallest of the options in the army lists, requiring just another ten man warrior group to go with the thirty figures already done. I have a group of six Fanatical Warriors painted, based and ready to go and a group of six Tribal Slingers almost completed.

The Oathsworn Warriors are a mixture of Victrix, Foundry and, no longer available, Black Tree Design figures. I am a little disappointed with the Victrix set; they are just not furry enough for me! The character on the right is a Victrix figure in captured Legionary armour but I've given him a Green Stuff fur cloak to Barbarianise him. The Victrix heads are excellent and look really good when the mop of hair blends into a nice furry cloak.

The ordinary warriors are again a mix of different manufacturers' figures, mostly Victrix, with added fur for some, and the Black Tree and Warlord figures pressed back into service from my earlier Year of the Four Emperors project.

So, still a lot of work to do to arrive at the point of having an Infamy! army ready for the table top... Not surprisingly, this Lardies rule set requires a lot more than just groups of fighting figures; the Warlord Games figure peering around the tree at the top of the page is the first of six "Ambush" markers that need to be built, I have a load of Foundry Germanic women to paint as a "Wailing Women" rallying point, the Warlord and his subordinates need painting and I have some Foundry archers to paint as Woodsmen missile men. Beyond all of this, of course, will be a bag of Victrix Roman Auxiliaries, which can undergo plenty of modification, particularly with those wonderful Victrix heads, to become the revolting Batavian Auxiliaries of my favourite year in the entire history of the Roman Empire... The Year of the Four Emperors! 


Wednesday, 24 June 2020

Charlie Foxtrot Eastern European Buildings.


It’s not very often that I get far enough into a wargaming project to start thinking about spending some time and effort on building a battlefield with things for my soldiers to fight over. Usually, by that stage, I’m ready to start painting figures for a different army!

With my Chain of Command Soviets however, events have actually taken a rather interesting turn; my modelling bench currently has no figures on it waiting to be painted! Instead, it is full of bits of MDF, sheets of cork, PVA glue and an assortment of oil drums, barrels, crates and what might be referred to as “battlefield clutter”. I’ve even spent quite a few fruitless hours trawling the Internet for a model tractor that I could have rusting away in a dilapidated barn on the collective farm.

All wargamers know, that sometimes a chance event can inspire you to embark on a project that you might not otherwise have even considered doing. In this case, my chance event was coming across the web site of Charlie Foxtrot Models. I’d been half-heartedly searching for some buildings that would be suitable to use on an Eastern Front battlefield on and off for a year or two, but I’d never got any further than that because what I found was either not the quality that I wanted, or way beyond the price that I could justify paying. I can imagine what my wife would have said if I’d told her that I’d paid over £200 for a model barn!

With Charlie Foxtrot, however you get top quality, precision, laser cut buildings that are definitely historically accurate (I know that because I’ve seen photographs of the very same buildings taken during the war) and are available at a really competitive price. The kit design is well thought out and all the component parts fit together exactly as it says in the instructions, although you can put the kits together without instructions really, as everything is so cleverly and logically designed. These building are obviously designed by someone who has actually been through the frustration of trying to put a kit together and finding that the reality is somewhat different to what was in the head of the designer. Charlie Foxtrot buildings do exactly what it says on the tin.

Having said all this, for my first go at construction, I decided not to launch into the house itself, but rather take a more stepped approach and build the log store (which you can now see attached to the side of the house) first. Doing this enables you to get used to the way things fit together on something a bit smaller. Doing the roof with the waney edge planking was good practice too, as the house roof requires a good eye, to ensure that everything lines up and overlaps correctly.

Once the construction is done, you need to paint the model and here, my dry run with the log store proved invaluable. I came up with an overly complex scheme for painting that and decided that, when I did the house, I was going to make it much simpler by not painting at all. Tucked away in a box at the back of one of the paint store shelves was a bottle of muddy brown wash that I had bought a couple of years ago from Florry Models and never used. Florry make their washes from stuff like mud and clay which, of course, gives them a really natural finish. Using the roof as a practice area, I applied the muddy brown wash in fairly random splodges and decided straight away that that was pretty much all the building needed. 

All the walls were washed once and then, once it was dry, I applied secondary washes but just in selected areas. With that all dry, I used small amounts of an old bottle of goblin green wash here and there, just to give some of the woodwork a bit of a green Russian winter tinge. The windows were painted with Olive Green and the doorsteps with London Grey and that, was pretty much it.

Of course, the fun really begins when you start to put the buildings onto their very own piece of real estate with a few bits of clutter to add a bit of life to the scene. The fencing around the yard is also from Charlie Foxtrot and it did have me a little perplexed to begin with. However, once you realise that you can just cut it and stick it into whatever combinations you need to suit the job, it all becomes a really enjoyable challenge getting it to do what you want it to do. 

Having completed Rural House 1, I shall definitely be adding more Charlie Foxtrot buildings to my Soviet Collective. When you consider the quality of the model and the price tag of just over £12, why would you bother even looking at anything else? As you can see from the photos, my Chain of Command Soviet platoon have settled in and are prepared to fight to the death to stop the Huns from getting their Germanic hands on their property. I’ve already built an outside privy to go in the back yard of my next building and there is no way that any self-respecting soldier of the Motherland is going to let the Deutsches occupy that little piece of real estate.
If you want to get your hands on some Charlie Foxtrot buildings, or see what else they have to enhance your model battlefield than have a look at the web site. You can find a link in the "Essential Links List" at the side of the page.


Wednesday, 27 May 2020

Chain of Command - A Soviet Scout Squad!


Oh dear... I sort of knew that hitting retirement just as the Lockdown came into force was going to result in a few very random weeks as far as hobbying was concerned! I've completed the painting of two Clash of Spears armies and then, I had a burst of activity on some medieval knights, caused by accidentally re-reading my long dormant Lion Rampant rule set and then...
I knew that, at some point, I was going to be digging out my Warlord Soviets again, because I had already decided that Chain of Command was the way forward with World War II skirmishing, rather than Bolt Action, and my Russians would need a little tinkering with to fit in with the Chain of Command army list. Not that I don't like Bolt Action, I just think that Chain of Command is a heap better rule set, as it is, apart from many other things, much more focussed on the sharp end of infantry combat.
One of the decisions I made when I was painting my Soviets for Bolt Action, was to field a squad of SMG armed infantry and these don’t appear as an option when you want to field a rifle platoon in Chain of Command! The list of support squads in the Chain of Command rule book does have a "Scout Squad" however, consisting of a junior leader and two sections, each with two SMGs and two rifles. This would employ five of the SMGs that I'd already painted and would give me four more riflemen to paint. As it is nearly two years since I painted any Soviets, I thought that this would get me nicely back into the painting groove, because I also need to paint up a few more riflemen to complete the third rifle squad required in the rules. 
In Chain of Command, the use of scouts is defined under the Soviet National Characteristics, where they are referred to as Razvedchiki, and each team is allowed to move with 1 or 2 D6 and assume a Tactical stance at the end of the move. For someone who chose Soviets because commanding them means you don’t need to concern yourself with anything as complicated as thinking, this is quite a revolutionary concept and may take some time and cerebral effort to get used to!


Appearing, as they do, in List 5 in the Support Lists, the Razvedchiki might not be fielded too often in campaigns to come, but they are a welcome addition to my Rifle platoon and, at the outset, before casualties are taken, they are composed as follows:


Serzhant Usilov Makarovich – squad leader 
Первый Команда:

Maxim Pavlovich (SMG)

Novoseltsev Fyodorovich  (SMG)

Tarasik Victorovich (Rifle)

Vedeneyev Maximovich (Rifle)


Второй Команда:

Arsenyev Borisovich (SMG)

Dementyev Nikitovich (SMG)

Gavrikov Dmitrivich (Rifle)

Zharkov Filippovich (Rifle)
As you may have noticed, the name generator I am using tends to apply the same four letters to the end of surnames!

Saturday, 9 May 2020

A Knight's Tale... The Story Continues.


Otto von Wassenberg…

Just after sunset on Friday 22nd September 1415, two cloaked and hooded figures stepped out of the doorway of a lowly miserable ale house and joined a mass of desolate humanity anxiously forcing their way southwards towards the Pont de Rouen and the uncertain destiny that awaited them now that the city had fallen to the army of the English King. Beyond the devastated breech in the city walls, where, even now, English soldiers were pouring into the city, were the forces of the Duke of Clarence and, only when that gauntlet had been run, could the two friends begin to think about making their way across Normandy to the relative safety of the chateau, about which they had spoken so often over the previous few weeks.

Since August, Otto von Wassenberg and his new found comrade in arms, Guy de Haudricourt had given their utmost in the defence of Harfleur under their commander, the Sire de Goucourt, but now, with the army of the Dauphin sitting idly by miles to the south, the city had fallen and its citizens brutally expelled by the English. Guy, one of the many Norman knights who had answered the call to defend Harfleur had been wounded during the terrifying bombardment by King Henry’s massive train of artillery and the German knight, Otto, had sworn to return him to the woman he had married just weeks before the siege began.

Otto was a mercenary knight from a minor branch of the Wassenberg family from the far away Duchy of Cleves. The main branch of the family had, for centuries, been Dukes of Cleves but their line died out in 1368 when Duke Johann passed away with no child to succeed him. In 1415, Otto found himself fighting in the army the French king and, when the call had gone out for volunteers to join de Goucourt, his love of danger and adventure, not to mention a little fame and glory, had driven him, as it always did, to step forward and accept the challenge. Ahead of the two friends now lay a journey, fraught with danger, of more than seventy miles across Normandy. It was a journey that would take them between the armies of the English to the north and the French to the south and, if successful, would lead them to the Chateau of Hardricourt and the Lady Eleonore.

To be continued…